I’m gonna kick off a new series of tech articles here on Shredaholic by starting with a series entitled “How To Build Guitars on a Budget“. In this first article, I’ll be talking about making something that seems tricky but is actually one of the simplest projects you can do when starting to build your own electric guitars; a double neck Fender Stratocaster body. Building guitars is something I’ve never had any formal training to do, but through reading ebooks such as Martin Koch’s “How To Build Your Own Guitar” that I obtained through clickbank, and a bit of practice, I’ve managed to develop the necessary skills to make some cool guitars on a limited budget. Make sure you fully understand how to use power tools before embarking on a project, safety is paramount.
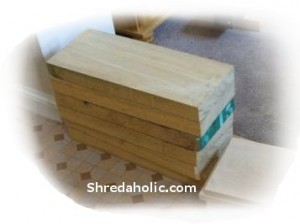
First off we need to order some wood. A 3m (or 120 inch) long rough sawn plank will be enough to build 2 of these bodies, and since it’s going to be planed smooth it needs to be 50mm/2″ thick and 200mm/8″ wide.
The first step is to saw the wood into 6 equal length pieces – each body will require 3 of these joined to make a really wide body blank.

After that, the lengths of wood need to be planed reasonably flat on the faces but not perfect, and then jointed. Gluing 3 pieces together isn’t that hard, it just requires you to do one glue joint first, then a second. The trick is to get the faces that you’re gluing as close as possible to 90 degrees relative to the main face of the wood, otherwise you will end up with a body blank that requires a lot taken off both faces to become 45mm/1 3/4″ thick evenly all over.
Once the lumber has been glued together, it needs to be surfaced on both sides by a hand plane (click to read how) or machine planer to make sure it’s of even thickness. Now the fun starts!
To make a double neck Strat body, it really helps to have a template made first. This is a must for so many reasons; templates are cheap and if it’s cut wrong you can make another for very little, you can change the design easily, it allows you to make more than one body exactly the same, etc. Don’t bother making guitar bodies without templates, honestly I’ve tried and it’s not worth it, don’t do it to yourself. Just make a template, then get a pattern follower bit for a plunge router and you’re done.
Here’s the template I made. The only company I know that makes these bodies is Warmoth, but I don’t like their staggered design where the extra neck (usually 12 string or bass) is higher up than the 6 string neck on the body. This creates a strange asymmetrical look, so instead of copying their design, I just made my own by drawing round a standard Stratocaster template twice, with the two pencil drawings 5 3/16″ (132mm) apart from each other, and then rubbing out the overlap and drawing in a few adjustments. Very, very simple, but effective.
Trace around the template with a pencil to leave a guide in which to loosely bandsaw around. The more excess wood you leave the safer bandsawing will be, but the more you will have to cut away later with a pattern follower router bit.
Once the body is cut to shape and tidied up at the edges, you can start routing out the cavities and neck pockets – to figure out where they were and to tidy them up, I just used a single Strat body cavity template twice. On my guitar, the 6 string neck will have a vintage style tremelo routing, and the 12 string neck will have no tremelo routing and will just be a hardtail bridge. Notice how I haven’t rounded the edges over yet – it helps to do this later, as inevitably edges can get chipped/dented when working on the body, so doing it afterwards will remove any damage accumulated while manufacturing it.
To round over the edges I used a (3/8″? I think) radius roundover router bit. You can use smaller ones such as 1/4″ for a really sharp and clean roundover, for example on a soloist style body that has artwork over the face, or large 1/2″ ones for a really smooth feel. Also, changing the depth of the bit when using it changes the angle of the roundover – and sanding afterwards will blend any of these roundovers in nicely.
To carve the ergonomic cutouts on the guitar body I used an old spokeshave I found in the garage – this worked really nicely and pulling it across the wood to create the cutouts that your right forearm and your ribcage lean against was very simple. After getting the rough shape right, some 400 grit sandpaper finished off the job.
Here’s the body almost finished, once the necks are completed and the hardware is purchased, holes can be drilled to get an exact fit. You can either sand the body to 600 grit before painting, or use a finely honed scraper.
copyright © Richard Baines 2010
nice post. thanks.
found your site on del.icio.us today and really liked it.. i bookmarked it and will be back to check it out some more later
